
Palworld Story Bosses Guide: Towers, World Tree Fights, and Hard Mode
Quick answer
Follow the story ladder: Rayne (Grizzbolt), Free Pal Alliance (Lyleen), Eternal Pyre (Orserk), PIDF (Faleris), PAL Genetic (Shadowbeak), Moonflower (Selyne), Feybreak (Bastigor), then Azure Covenant (Shaolong). After that: Panthalus, the three World Tree guardians, then Zenara & Astralym.
Towers are a story ladder first and an endgame rematch later. This Sphere Signal walks every tower boss, the three World Tree guardian fights, and Zenara & Astralym — with fight notes, Hard Mode builds, and stage-appropriate parties.
Overview
Story combat in 1.0 is a ladder: Palpagos and Feybreak towers, Azure Covenant, the Panthalus capture that opens the World Tree, three World Tree guardian clears that break the inner seal, then Zenara & Astralym. Clear towers in story order on Normal with a party that matches your level band. After Azure Covenant, Hard Mode rematches open for every tower — treat those as endgame checks with shared player-damage or lifesteal cores.
Boss art on this page is the live Paldeck portrait for each fight Pal (same assets as the Dex). We do not ship separate arena screenshots or unique GYM-only skins — gym variants reuse the species portrait. Astralym also has a second form portrait in our extract when the fight shifts phases.
All syndicate tower entrances on the interactive map.
Open tower mapPanthalus World Tree unlock fight (after Azure Covenant).
Panthalus guideFull story battle order
- Towers 1–8: Rayne → Free Pal Alliance → Eternal Pyre → PIDF → PAL Genetic → Moonflower → Feybreak → Azure Covenant (open the Towers tab for each fight).
- Panthalus: mandatory capture after Azure Covenant to open the World Tree barrier (dedicated Sphere Signal).
- World Tree guardians (three clears): Silvance at Shinespore Root, Dandilord at Rotmist Root, Forbidden Laboratory gauntlet — break the Sealed Sanctum barrier.
- Zenara & Astralym: final World Tree fight once guardian keys and tower Key Spheres are done.
Tower ladder (Normal story order)
Recommended levels are when most players first clear the door, not the absolute minimum. If wild Pals outside the entrance delete your party, back out and level before walking in.
- Rayne Syndicate — Zoe & Grizzbolt (Electric) — ~Lv 10–15 — weak to Ground
- Free Pal Alliance — Lily & Lyleen (Grass) — ~Lv 20–30 — weak to Fire
- Brothers of the Eternal Pyre — Axel & Orserk (Electric / Dragon) — ~Lv 35–40 — weak to Ground and Ice
- PIDF — Marcus & Faleris (Fire) — ~Lv 40–45 — weak to Water
- PAL Genetic Research Unit — Victor & Shadowbeak (Dark) — ~Lv 45–55 — Dragon answers preferred
- Moonflower — Saya & Selyne (Dark / Neutral) — ~Lv 55 — Dragon or Dark pressure
- Feybreak — Bjorn & Bastigor (Ice) — ~Lv 60 — weak to Fire
- Azure Covenant — Auri & Shaolong (Dragon / Water) — ~Lv 65–70 — Ice / Dragon answers; story continues into Panthalus


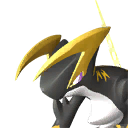
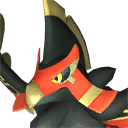


Shared prep for every Normal tower
- Match the boss element before you match vanity legendaries. A correct counter shortens the fight more than a stronger off-type Pal.
- Condenser stars and Statue of Power souls on the raid six you actually bring.
- Typed Skill Fruits for coverage gaps on your counter Pal.
- Food, repair mats, and a sphere tier that matches the level band if the fight also asks for a capture.
- Fast Travel to the tower entrance, then scout the door. Entrance wildlife is a free gear check.
Sphere tier ladder for tough throws.
Sphere tiersElement party building beyond a single counter.
Team synergiesHard Mode: Builds
Hard Mode unlock and rules
Hard Mode rematches unlock after you defeat the Azure Covenant Tower (Auri & Shaolong) in the main story. In 1.0 that is the gate — not an older checklist of clearing every Normal tower first. Once unlocked, every tower gains a Hard variant with far higher HP and damage, faster patterns, and often extra summoned enemies mid-fight.
- Treat Hard Mode as endgame: player and Pals near max level, best armor and shield, legendary firearms, High Grade Medical Supplies, and +2 Elemental Resistance Rings for the boss type.
- Hard Mode is optional for story progression. Clear Normal to move the plot, then return when your builds are ready.
- Several Hard bosses change attack behavior instead of only inflating numbers. Learn the new tells; do not rely on Normal muscle memory.
- Most Hard rematches spawn extra allies (faction humans and/or Pals, often ~Lv 70+) at the start. They cannot be captured — clear them before tunnel-visioning the boss.
- Save rockets and Partner Skill burst for those adds. Clearing reinforcements fast matters more than dumping everything into the boss the moment the fight starts.
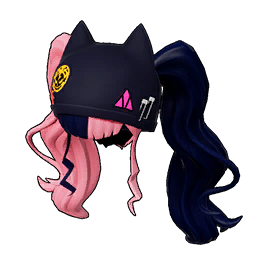
Zoe Hat
Armor
Dress up like Zoe using this special headpiece!
Lily Hat
Armor
Dress up like Lily using this special headpiece!
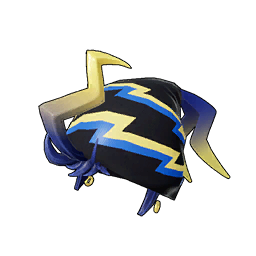
Axel Hat
Armor
Dress up like Axel using this special headpiece!
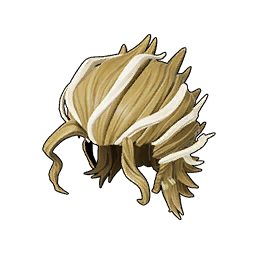
Marcus Hat
Armor
Dress up like Marcus using this special headpiece!

Victor Hat
Armor
Dress up like Victor using this special headpiece!
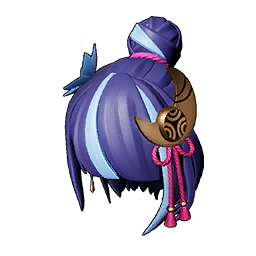
Saya Hat
Armor
Dress up like Saya using this special headpiece!

Bjorn Hat
Armor
Dress up like Bjorn using this special headpiece!

Auri Hat
Armor
Dress up like Auri using this special headpiece!
Hard clears also lean on Training Crystals and a chance at legendary schematics tied to each tower. Exact schematic tables shift with patches — treat hats as the guaranteed cosmetic identity and farm with eyes open for the legendary rolls.
Hard Mode builds (use these for every rematch)
Normal parties below match the level you fight each tower the first time. Hard Mode parties should all assume max level and endgame gear. Pick one of these cores, then swap only the elemental flex slots per boss.
Build A — Gobfin lifesteal (safest first clears)
Active Felbat (Life Steal) or Lovander (Heart Drain) so player hits heal. Fill the other four slots with Gobfin. Breed Vanguard and Stronghold Strategist onto the Gobfins so Angry Shark’s party Attack buff and your defense floor stay stacked. Push player Attack investment and keep shooting — the heal forgives mistakes that end other runs.
 FelbatPaldeck #065
Life Steal
ActiveLifestealLife Steal restores a cut of damage dealt to you and Felbat. Keep Felbat out while you gun.
 LovanderPaldeck #069
Heart Drain
Active altLifestealHeart Drain is the same job as Felbat if you prefer Lovander’s kit.
 GobfinPaldeck #055
Angry Shark
×4PassivesAngry Shark raises player Attack while in party. Stack four Gobfins with Vanguard + Stronghold Strategist.
Lifesteal core
Build B — Knocklem rotation (Pal-focused)
Run multiple Knocklems and rotate Steel Guardian Mode so something is always buffed and holding aggro while you fire from range. Practice the swap rhythm once; after that Hard Mode becomes a controlled farm instead of a panic heal-check.
 KnocklemPaldeck #159
Steel Guardian Mode
TankPartner SkillSteel Guardian Mode spikes Attack and Defense for a window. Swap before the buff drops.
 Knocklem IgnisPaldeck #159
Iron Guardian Mode
Fire flexKnocklem Ignis keeps the same rotation plan when the boss is weak to Fire (Lyleen, Bastigor).
Knocklem rotation
Build C — Solenne player-damage core (fast clears)
Community consensus for short Hard Mode fights: lock three Pals that stack weak-point and player Attack, then use the last two slots for an elemental mount that converts your weapon type plus a matching support. Keep every party member a different species so Solenne’s Untainted Maiden stays on. Aim weak points; body shots waste the Cryolinx Terra and Vanwyrm Cryst multipliers.
 SolenneCore
Player ATK
Untainted Maiden
Untainted Maiden: large player Attack buff if every party Pal is a different species.
 Vanwyrm CrystCore
Weak point
Aerial Marauder
Aerial Marauder: flying mount and big weak-point damage for the player.
 Cryolinx TerraCore
Weak point
Explosive Strength
Explosive Strength: next weak-point hit gains a large power spike after you land a weak-point attack.
Fixed core — do not swap these three between towers
 AnubisGrizzbolt · Orserk
Ground mount
Guardian of the Desert
Guardian of the Desert converts player attacks to Ground. Pair with another Ground support if you have the slot.
 WixenLyleen · Bastigor
Fire mount
Lord Fox
Lord Fox converts player attacks to Fire. Excellent Hard Mode flex for Grass and Ice towers.
 AzurobeFaleris
Water mount
Waterwing Dance
Waterwing Dance converts player attacks to Water for the Fire tower rematch.
 ChilletShadowbeak · Selyne · Shaolong
Dragon mount
Wriggling Weasel
Wriggling Weasel converts player attacks to Dragon when that is the clean answer.
 FrostallionOrserk · Shaolong
Ice mount
Icy Steed
Icy Steed converts player attacks to Ice for Dragon/Electric or Azure answers.
 RobinquillAny bow run
Bow support
Grounded Archer
Grounded Archer raises player bow damage. Slot when you are running Mechanical Bow weak-point lines.
Flex pair by boss weakness (mount converts your attack type)
Status and dual-status kits when a tower fight turns into a long phase check.
Dual status buildsCommon mistakes
- Running Solenne with two of the same species so Untainted Maiden never turns on.
- Shooting the body when Cryolinx Terra and Vanwyrm Cryst are in the party.
- Swapping the whole core every tower instead of only the elemental flex.
- Attempting Hard Mode before Azure Covenant unlocks it.
After this clear
- Pick Build A for first clears, Build C when you can hit weak points consistently.
- Open each NPC tab above for the rematch flex and hat notes.
- Restock High Grade Medical Supplies and +2 resistance rings before the first rematch.
Element Skill Fruits for whichever flex mount you lock per tower.
Best Skill FruitsBrowse the full PalDex when you need another flex species.
Open PalDexHard Mode: Zoe
Zoe & Grizzbolt Hard Mode is a huge HP spike with two Syndicate human adds at pull. Clear the Gunner and Crusher first, then ignore pillar camping and keep strafing; several patterns punch through cover.
- Counter: Ground. Build A (Gobfin lifesteal) or Build C with Anubis as the Ground mount.
- Hard Mode adds (start of fight): Syndicate Gunner x1 and Syndicate Crusher x1. Clear them first; they cannot be captured.
- Hard Mode rewards: Zoe Hat on first Hard clear, Training Crystals, chance at Legendary Beam Scatter schematic.
- Do not rely on Normal tower muscle memory; patterns and HP both change.
Build C flex for this rematch
Normal clear notes, map entrance, and stage-appropriate party for this tower.
Open Normal tower tabCommon mistakes
- Pillar camping on Hard Mode when patterns already ignored cover on Normal.
- Running Build C without Anubis (or another Ground mount) in the flex slots.
- Duplicate species in the Solenne party so Untainted Maiden is off.
- Shooting the body instead of weak points with Cryolinx Terra and Vanwyrm Cryst active.
After this clear
- Bank Zoe Hat and any Training Crystal drops before the next rematch.
- Keep the Ground flex mounted for Orserk Hard later.
- Repair legendary firearms and restock High Grade Medical Supplies.
Rockburst on your Ground flex for Zoe Hard Mode.
Rockburst fruitGround PalDex for Zoe Hard Mode flex options.
Ground PalDexHard Mode: Lily
Lily & Lyleen Hard Mode wants Fire answers and opens with Free Pal Alliance Believer and Judicator adds. Clear the humans first. Do not bring Ground; Lyleen resists it.
- Counter: Fire. Build C with Wixen (FoxMage) or Pyrin flex, or Knocklem Ignis in Build B. Do not bring Ground.
- Hard Mode adds (start of fight): Free Pal Alliance Believer x1 and Free Pal Alliance Judicator x1. Rocket or burst them before committing to Lyleen.
- Hard Mode rewards: Lily Hat on first Hard clear, Training Crystals, chance at Legendary Drone Launcher schematic.
- Grass Tornado-style patterns still punch through pillars; sprint out instead of hugging cover.
Build C flex for this rematch
Normal clear notes, map entrance, and stage-appropriate party for this tower.
Open Normal tower tabCommon mistakes
- Bringing Ground into Hard Mode Lyleen.
- Running Knocklem without the Ignis flex when you chose Build B.
- Letting the heal window run because Fire conversion was never slotted.
- Treating Hard Lily like Normal with the same pillar habits.
After this clear
- Bank Lily Hat; note schematic rolls for launcher lines.
- Keep Wixen / Pyrin ready for Bastigor Hard next.
- Restock Burn food and meds before the next Fire rematch.
Flame Funnel for Hard Mode Lyleen.
Flame FunnelFire PalDex for Lily Hard Mode.
Fire PalDexHard Mode: Axel
Axel & Orserk Hard Mode mixes Electric and Dragon pressure and opens with Mossanda Lux and Relaxaurus Lux. Clear those Electric adds first, then keep moving through dragon telegraphs.


- Counters: Ground or Ice. Build C with Anubis or Frostallion (IceHorse) in the flex slots.
- Hard Mode adds (start of fight): Mossanda Lux x1 and Relaxaurus Lux x1. Kill the Electric Pals first; they cannot be captured.
- Hard Mode rewards: Axel Hat on first Hard clear, Training Crystals, chance at Legendary Heat-Resistant Ancient Armor schematic.
- Keep moving through dragon telegraphs after the adds are down.
Build C flex for this rematch
Normal clear notes, map entrance, and stage-appropriate party for this tower.
Open Normal tower tabCommon mistakes
- Standing in dragon telegraphs after Normal muscle memory.
- Forgetting the Ice flex when Ground is already committed elsewhere.
- Dumping rockets at pull instead of add waves.
- Under-gearing resistance rings for a rematch this long.
After this clear
- Bank Axel Hat and Training Crystals.
- Prep Azurobe Waterwing Dance for Marcus Hard.
- Repair mounts and restock rockets for summon-heavy rematches.
Ground or Ice Skill Fruits for Orserk Hard Mode.
Best Skill FruitsGround PalDex for Axel Hard Mode.
Ground PalDexHard Mode: Marcus
Marcus & Faleris Hard Mode is a Fire rematch that opens with four PIDF humans (two Riflemen, two Elites). Clear the adds first, then Water conversion on your gun shortens the boss phase.
- Counter: Water. Build C with Azurobe (BlueDragon) Waterwing Dance in the flex slots.
- Hard Mode adds (start of fight): PIDF Rifleman x2 and PIDF Elite x2. Clear the humans first; they cannot be captured.
- Hard Mode rewards: Marcus Hat on first Hard clear, Training Crystals, chances at heat- and cold-resistant ancient armor schematics.
- Recall Water Pals during Electric skills if Faleris mixes them in.
Build C flex for this rematch
Normal clear notes, map entrance, and stage-appropriate party for this tower.
Open Normal tower tabCommon mistakes
- Skipping Waterwing Dance when Build C is otherwise correct.
- Burning Partner Skill burst before the add wave.
- Running Fire vanity flexes into Faleris Hard.
- Body shots instead of weak points on the Solenne core.
After this clear
- Bank Marcus Hat.
- Slot Chillet for Victor Hard next.
- Restock Water Skill Fruits and meds.
Hydro Slicer for Marcus Hard Mode.
Hydro SlicerWater PalDex for Marcus Hard Mode.
Water PalDexHard Mode: Victor
Victor & Shadowbeak Hard Mode has no extra allies. The trap is clone / decoy patterns: ignore fakes, burst the real target, and prefer Dragon/Fire dual-types into Ice coverage.
- Counter: Dragon. Prefer Dragon/Fire dual-types so Ice coverage does not delete your active Pal.
- Hard Mode adds: none. The pressure spike is clone / decoy patterns, not extra humans or Pals.
- Hard Mode rewards: Victor Hat on first Hard clear, Training Crystals, chance at Legendary Cold-Resistant Ancient Armor schematic.
- Identify the real Shadowbeak before dumping rockets into clones.
Build C flex for this rematch
Normal clear notes, map entrance, and stage-appropriate party for this tower.
Open Normal tower tabCommon mistakes
- Dumping rockets into clones before identifying the real Shadowbeak.
- Missing the Dragon flex in Build C.
- Duplicate Solenne party species.
- Treating Hard Genetic like a Normal reskin.
After this clear
- Bank Victor Hat.
- Keep Chillet or Helzephyr ready for Saya Hard summons.
- Restock rockets specifically for clone and add phases.
Beam Slicer for Victor Hard Mode.
Beam SlicerDragon PalDex for Victor Hard Mode.
Dragon PalDexHard Mode: Saya
Saya & Selyne Hard Mode opens with Moonflower Genin x2 and Moonflower Jonin x1. Save rockets for those humans, clear them, then return to Selyne.
- Counters: Dragon or Dark pressure. Solenne core with Chillet or Helzephyr flex.
- Hard Mode adds (start of fight): Moonflower Genin x2 and Moonflower Jonin x1. Clear the humans first; they cannot be captured.
- Hard Mode rewards: Saya Hat on first Hard clear, Training Crystals, chance at Legendary Plasma Rifle schematic.
- Save rockets for the Genin / Jonin wave, then return to Selyne.
Build C flex for this rematch
Normal clear notes, map entrance, and stage-appropriate party for this tower.
Open Normal tower tabCommon mistakes
- Dumping rockets into Selyne before the summon wave dies.
- Running the Solenne core with duplicate species.
- Skipping Dragon or Dark flex pressure.
- Saving zero meds for a rematch this long.
After this clear
- Bank Saya Hat.
- Prep Fire flex and Ice rings for Bjorn Hard.
- Restock rockets before the next summon-heavy rematch.
Dragon or Dark Skill Fruits for Saya Hard Mode.
Best Skill FruitsDragon PalDex for Saya Hard Mode.
Dragon PalDexHard Mode: Bjorn
Bjorn & Bastigor Hard Mode is Ice and opens with two Feybreak Warriors and one Feybreak Berserker. Clear the humans first. Fire answers and Ice resistance rings are mandatory.
- Counter: Fire. Wixen / Pyrin / Knocklem Ignis. Equip +2 Elemental Resistance Rings for Ice.
- Hard Mode adds (start of fight): Feybreak Warrior x2 and Feybreak Berserker x1. Clear the humans first; they cannot be captured.
- Hard Mode rewards: Bjorn Hat on first Hard clear, Training Crystals, chance at Legendary Lightweight Ancient Armor schematic.
- Treat this as a gear check; under-armored runs get deleted by Bastigor patterns.
Build C flex for this rematch
Normal clear notes, map entrance, and stage-appropriate party for this tower.
Open Normal tower tabCommon mistakes
- Skipping +2 Ice resistance rings on Bjorn Hard.
- Bringing anything but Fire into Bastigor Hard.
- Under-armoring for Feybreak rematch damage.
- Body shots on the Solenne weak-point core.
After this clear
- Bank Bjorn Hat.
- Prep Frostallion or Chillet for Auri Hard.
- Repair Plasteel / legendary armor before Azure rematch.
Flame Funnel for Bjorn Hard Mode.
Flame FunnelFire PalDex for Bjorn Hard Mode.
Fire PalDexHard Mode: Auri
Auri & Shaolong Hard Mode is a solo rematch (no extra adds) with flood and Celestial Vortex phases. Ice or Electric answers, weak-point aim, and the timer matter more than add management.
- Counters: Ice or Electric (and Dragon pressure still helps). Build C with Frostallion or Orserk-style flexes.
- Hard Mode adds: none. Pressure comes from flood / Celestial Vortex phases and the timer, not extra allies.
- Hard Mode rewards: Auri Hat on first Hard clear, Training Crystals, chance at Legendary Beam Launcher schematic.
- Aim blue weak points (Auri head / Shaolong blue parts); fur often fails to register hits.
Build C flex for this rematch
Normal clear notes, map entrance, and stage-appropriate party for this tower.
Open Normal tower tabCommon mistakes
- Treating Auri Hard as optional fluff and skipping World Tree prep after.
- Missing Ice or Dragon flex in Build C.
- Dumping cooldowns at pull on a rematch with long phases.
- Running without endgame meds and resistance rings.
After this clear
- If Normal Azure is done, Hard Mode is already unlocked for the other towers.
- Return to Panthalus / World Tree story if those are still open.
- Farm Training Crystals here when you want a long endgame tower loop.
Diamond Rain or Beam Slicer for Auri Hard Mode.
Best Skill FruitsIce PalDex for Auri Hard Mode.
Ice PalDexTowers: Zoe
First tower wall. Grizzbolt is pure Electric (Yellow Tank partner skill). Normal clears around Lv 10–15. Ground damage is the clean answer. Stay mobile — several patterns punch through pillars, so cover is less safe than it looks.
- Element: Electric. Counter: Ground.
- Map: Rayne Syndicate Tower Entrance.
- Normal rewards: Ancient Technology Points on first early-ladder clears.
- Hard Mode (separate tab): Zoe Hat on first Hard clear, Training Crystals, schematic rolls, plus Syndicate Gunner and Crusher adds.
 RushoarPaldeck #028
Hard Head
EarlyGroundRushoar is an easy early Ground answer before Anubis is realistic.
 DigtoisePaldeck #107
Drill Crusher
GroundDigtoise brings steady Ground pressure and is available on the early route.
- AnubisPaldeck #139
Guardian of the Desert
StretchMountBest Ground converter once you can field it. Guardian of the Desert also powers your gun.
Normal party (~Lv 10–15)
Rayne Syndicate tower pin.
Tower entrances mapCommon mistakes
- Walking into Zoe under-leveled because the overworld felt easy.
- Hugging pillars when Grizzbolt patterns punch straight through cover.
- Bringing Fire or Water vanity Pals instead of a Ground answer.
- Skipping Condenser stars on Rushoar or Digtoise because it is early game.
After this clear
- Restock spheres and food, then route toward the Free Pal Alliance tower.
- Start fielding early Fire answers (Foxparks and friends) for Lily.
- Return under Hard Mode later for Zoe Hat once Azure Covenant is cleared.
Teach Rockburst or other Ground Skill Fruits on your raid Ground Pal.
Rockburst fruitFilter the PalDex for Ground (Earth) counters for Zoe & Grizzbolt.
Ground PalDexTowers: Lily
Lyleen is Grass. Fire melts the fight; Burn DoTs help on longer attempts. Normal around Lv 20–30. Hard Mode Lyleen is a notorious sponge — Fire conversion plus weak-point focus ends the heal window before it matters. Grass Tornado-style patterns punch through cover; sprint out instead of hugging pillars.
- Element: Grass (Leaf). Counter: Fire.
- Map: Free Pal Alliance Tower Entrance.
- Normal rewards: story progress and Ancient Tech on first clears in this band.
- Hard Mode (separate tab): Lily Hat, Drone Launcher schematic chance, plus Free Pal Alliance Believer and Judicator adds.
 FoxparksPaldeck #029
Huggy Fire
EarlyFireFoxparks is the first Fire answer most players already own.
 ArsoxPaldeck #058
Warm Body
FireArsox is a clean mid-early Fire pick for this tower.
 IncineramPaldeck #091
Flameclaw Hunter
FireStretchIncineram carries the fight if you are ahead of the band.
- WixenPaldeck #078
Lord Fox
MountHard flexWixen converts your attacks to Fire — lock this for Hard Mode Build C.
Normal party (~Lv 20–30)
Common mistakes
- Bringing Ground into Lyleen. She resists it and the fight drags.
- Pillar camping into Grass Tornado-style patterns that ignore cover.
- Showing up below the Lv 20-30 band because Zoe felt easy.
- Saving all rockets for the boss and ignoring any add pressure on Hard later.
After this clear
- Condense Fire answers and restock Burn-friendly food before Eternal Pyre.
- Scout Axel's door wildlife as a free gear check.
- Return under Hard Mode later for Lily Hat and schematic farming.
Flame Funnel is the Fire Skill Fruit pick for Lyleen coverage.
Flame FunnelFilter the PalDex for Fire counters for Lily & Lyleen.
Fire PalDexTowers: Axel
Orserk is Electric / Dragon (Ferocious Thunder Dragon). Ground and Ice both work; many players prefer Ground for the Electric half and Ice for the Dragon half. Normal around Lv 35–40. Dodge big dragon swings instead of tanking — Hard Mode punishes planted feet.
- Element: Electric + Dragon. Counters: Ground, Ice.
- Map: Eternal Pyre Tower Entrance.
- Normal rewards: story progress through Eternal Pyre.
- Hard Mode (separate tab): Axel Hat, heat-resistant ancient armor schematic chance, plus Mossanda Lux and Relaxaurus Lux adds.
- AnubisPaldeck #139
Guardian of the Desert
GroundMountStill the clean Ground answer and player-type converter for Orserk.
 Reptyro CrystPaldeck #129
Ice-Loving Beast
IceReptyro Cryst covers the Ice half when you want typed Pal damage instead of gun conversion.
- FrostallionPaldeck #200
Icy Steed
Ice mountHard flexFrostallion converts player attacks to Ice for Hard Mode Build C.
Normal party (~Lv 35–40)
Common mistakes
- Packing only Electric answers into an Electric / Dragon fight.
- Standing still through dragon telegraphs after learning Zoe and Lily.
- Ignoring the Ice answer when Ground is not ready yet.
- Under-leveling for the ~Lv 35-40 Eternal Pyre door.
After this clear
- Prep Water answers (Azurobe line) for Marcus & Faleris next.
- Repair gear and restock meds before the PIDF tower.
- Bank Ancient Tech points if this was a first-ladder clear.
Rockburst (Ground) or Diamond Rain (Ice) for Orserk coverage.
Best Skill FruitsFilter Ground counters for Axel & Orserk (Ice is the other clean answer).
Ground PalDexTowers: Marcus
Faleris is Fire (Scorching Predator) with strong aerial pressure. Water is the counter. Normal around Lv 40–45. Keep the camera up — diving and bombarding patterns punish players who only watch the floor.
- Element: Fire. Counter: Water.
- Map: PIDF Tower Entrance.
- Normal rewards: story progress through PIDF.
- Hard Mode (separate tab): Marcus Hat, heat/cold ancient armor schematic chances, plus PIDF Rifleman and Elite adds.
 PenkingPaldeck #018
Brave Sailor
WaterPenking is a reliable Water combat Pal in this band.
 SurfentPaldeck #075
Swift Swimmer
WaterSurfent is an easier Water field option if Penking is late.
- AzurobePaldeck #041
Waterwing Dance
WaterMountAzurobe converts your attacks to Water — bring it for Hard Mode Build C.
 JormuntidePaldeck #121
Stormbringer Sea Dragon
WaterStretchJormuntide is the late Water hammer once you can breed or catch it.
Normal party (~Lv 40–45)
Common mistakes
- Bringing Fire vanity Pals into Faleris instead of Water.
- Dumping Partner Skill burst at pull instead of saving it for adds.
- Skipping Water conversion mounts once you own Azurobe.
- Treating PIDF as a sightseeing stop without Condenser stars.
After this clear
- Start Dragon answers for Victor & Shadowbeak.
- Restock High Grade Medical Supplies for the Genetic tower band.
- Return under Hard Mode later for Marcus Hat farming.
Hydro Slicer is the Water Skill Fruit pick for Faleris.
Hydro SlicerFilter the PalDex for Water counters for Marcus & Faleris.
Water PalDexTowers: Victor
Shadowbeak is Dark (Modified DNA). Dragon pressure is the usual answer; Neutral Pal Blast lines also work if your Dragon roster is thin. Normal around Lv 45–55. Hard Mode and some rematches spawn clones or avatars — identify the real boss and dump burst there instead of splitting damage.
- Element: Dark. Preferred counters: Dragon (or strong Neutral burst).
- Map: PAL Genetic Research Unit Tower Entrance.
- Normal rewards: story progress through PAL Genetic.
- Hard Mode (separate tab): Victor Hat and cold-resistant ancient armor schematic chance. No human/Pal adds; watch clone / decoy patterns.
 QuivernPaldeck #124
Sky Dragon Affection
DragonQuivern is a practical Dragon answer in this band.
- ChilletPaldeck #103
Wriggling Weasel
Dragon mountChillet converts player attacks to Dragon for Build C Hard clears.
 JetragonPaldeck #202
Aerial Missile
StretchMountJetragon is a late mount and Dragon DPS when you already have it — do not delay the tower forever waiting on one.
 NecromusPaldeck #199
Dark Knight of the Abyss
Dark answerNecromus Twin Spears style kits are a strong alternate if Dragon is unavailable.
Normal party (~Lv 45–55)
Common mistakes
- Tunnel-visioning clones or decoys instead of the real Shadowbeak.
- Bringing Neutral legendaries with no Dragon pressure.
- Walking in without meds for the Lv 45-55 band.
- Spending all rockets before the clone phase resolves.
After this clear
- Prep Dragon or Dark pressure for Saya & Selyne.
- Condense Chillet or another Dragon mount before Moonflower.
- Bank the Genetic tower unlock before rushing Sakurajima content.
Beam Slicer is the Dragon Skill Fruit pick for Shadowbeak.
Beam SlicerFilter the PalDex for Dragon counters for Victor & Shadowbeak.
Dragon PalDexTowers: Saya
Selyne is Dark / Neutral (Celestial Darkness). Normal around Lv 55. Dragon or Dark pressure both appear in successful clears. Hard Mode adds Moonflower Genin and Jonin (see Hard Mode tab).
- Element: Dark + Neutral. Counters: Dragon or Dark burst; prioritize adds.
- Map: Moonflower Tower Entrance.
- Normal rewards: story progress through Moonflower.
- Hard Mode (separate tab): Saya Hat, Plasma Rifle schematic chance, plus Moonflower Genin and Jonin adds.
 HelzephyrPaldeck #080
Wings of Death
Dark mountHelzephyr converts player attacks to Dark and covers aerial movement.
 BellanoirPaldeck #195
Nightmare Iris
Dark DPSBellanoir is a late Dark hammer when you can field her.
- ChilletPaldeck #103
Wriggling Weasel
Dragon mountChillet keeps the Dragon conversion plan if that is your Hard Mode flex.
 SelynePaldeck #190
Celestial Darkness
Catch goalSelyne herself is a prize for later parties — clear the tower, then breed and condense.
Normal party (~Lv 55)
Common mistakes
- Dumping rockets into Selyne before clearing summons.
- Running duplicate species if you already practice the Solenne Hard Mode core.
- Ignoring Dark or Dragon answers and hoping raw Attack carries.
- Skipping food and repair mats for the Lv 55 door.
After this clear
- Prep Fire answers and Ice resistance for Bjorn & Bastigor.
- Restock rockets specifically for summon-heavy rematches later.
- Return under Hard Mode later for Saya Hat cosmetic clears.
Beam Slicer or Dark Whisp depending on your Moonflower pressure plan.
Best Skill FruitsFilter Dragon counters for Saya & Selyne.
Dragon PalDexTowers: Bjorn
Bastigor is Ice (Blizzard Crash) and hits like a freight train up close. Fire is the counter. Normal around Lv 60. Stack defense and the correct resistance ring — this is a brawl, not a glass-cannon duel. Feybreak Tower also sits on the path that opens later Sunreach progression.
- Element: Ice. Counter: Fire.
- Map: Feybreak Tower Entrance.
- Normal rewards: story progress through Feybreak.
- Hard Mode (separate tab): Bjorn Hat, lightweight ancient armor schematic chance, plus Feybreak Warrior and Berserker adds.
 BlazamutPaldeck #137
Magma Kaiser
FireBlazamut is a top Fire Pal for this band.
 Jormuntide IgnisPaldeck #121
Stormbringer Lava Dragon
FireJormuntide Ignis brings Fire DPS and Burn synergy for longer phases.
 SuzakuPaldeck #122
Wings of Flame
FireSuzaku is another condensed Fire option for Feybreak.
- WixenPaldeck #078
Lord Fox
Fire mountHardWixen converts your gun to Fire for Build C rematches.
Normal party (~Lv 60)
Common mistakes
- Showing up without Fire answers into Bastigor.
- Skipping Ice resistance rings once you start treating Hard Mode prep seriously.
- Under-armoring for the Lv 60 Feybreak door.
- Bringing Water vanity Pals that Bastigor shrugs off.
After this clear
- Prep Ice and Dragon answers for Auri & Shaolong.
- Condense Wixen / Pyrin / Knocklem Ignis for Fire rematches later.
- Restock before Azure Covenant; that clear gates Hard Mode.
Flame Funnel for Bastigor Fire coverage.
Flame FunnelFilter the PalDex for Fire counters for Bjorn & Bastigor.
Fire PalDexTowers: Auri
Shaolong is Dragon / Water (Azure Sovereign). Ice and Dragon answers both appear in clear reports; stay aggressive in the short openings and do not turtle through every cooldown. Normal around Lv 65–70. This clear unlocks Hard Mode for all towers and continues the story into Panthalus and the World Tree.
- Element: Dragon + Water. Counters: Ice and Dragon pressure.
- Map: Azure Covenant Tower Entrance.
- Normal rewards: bank the Azure Covenant unlock immediately (Hard Mode gate + Panthalus path).
- Hard Mode (separate tab): Auri Hat, Beam Launcher schematic chance, no extra adds (solo rematch with flood / vortex phases).
- FrostallionPaldeck #200
Icy Steed
Ice mountFrostallion converts player attacks to Ice and is a strong Azure answer.
- ChilletPaldeck #103
Wriggling Weasel
Dragon mountChillet covers Dragon conversion if you prefer that half of the typing.
 AegidronPaldeck #184
Indestructible Fortress
Dragon DPSAegidron is a late Dragon combat Pal when you want Pal damage alongside your gun.
 ShaolongPaldeck #192
Azure Sovereign
Catch goalShaolong is also a top Watering worker later — clearing the tower feeds base progression too.
Normal party (~Lv 65–70)
After Azure Covenant: capture Panthalus for the World Tree barrier.
Panthalus guideFull Sunreach → World Tree unlock path.
Unlock World TreeCommon mistakes
- Treating Azure Covenant like a farm door and skipping the Panthalus follow-up.
- Bringing only Water answers into a Dragon / Water boss.
- Dumping every cooldown at pull instead of the short openings.
- Rushing out before banking the Hard Mode unlock.
After this clear
- Capture Panthalus next; a kill without capture stalls the World Tree barrier.
- Hard Mode rematches for every tower are now available when your builds are ready.
- Route Sunreach to World Tree unlock before hunting Silvance and Dandilord.
Diamond Rain (Ice) or Beam Slicer (Dragon) for Shaolong coverage.
Best Skill FruitsFilter Ice counters for Auri & Shaolong (Dragon is the other clean answer).
Ice PalDexWorld Tree: Path
Once Panthalus opens the World Tree, The Sealed Calamity points you at three guardian clears. Defeat all three to gather the seal keys (Silvance’s Plume, Dandilord’s Petal, and the Pal’s Containment Core from the lab). Capture is optional here — unlike Panthalus, a kill still counts for the barrier. Bring the Hard Mode endgame cores; these sit around Lv 78.


Common mistakes
- Skipping Panthalus capture and wondering why the World Tree terminal does nothing.
- Entering guardian fights without endgame cores because tower Normal felt finished.
- Forgetting you need Plume, Petal, and Containment Core before Astralym.
- Treating capture as mandatory on guardians; a kill still counts for the seal.
After this clear
- Clear Silvance, Dandilord, and the Forbidden Laboratory in any order you can gear for.
- Own Silvance / Dandilord afterward for spore and gas zone prep.
- Return to the western barrier with all three keys before Zenara.
Fire Skill Fruits cover both Grass guardians; review the full fruit list.
Best Skill FruitsOpen the PalDex for Lv 78 endgame counters.
Open PalDexWorld Tree: Silvance
Silvance is Grass (Leaf) with Spore Stalwart. Field boss at Shinespore Root on the southwestern World Tree edge, ~Lv 78. Fire is the clean answer. Silvance also matters outside the fight: Spore Stalwart covers Explosive Spore hazard immunity for World Tree exploration once you own it.
- Element: Grass. Counter: Fire (Wixen / Pyrin / Blazamut / Jormuntide Ignis).
- Location: Shinespore Root (southwest World Tree).
- Reward: Silvance’s Plume for the Sealed Sanctum barrier. Also a guaranteed Ancient Civilization Core on kill / capture / butcher loops.
- Party: reuse Bastigor / Lyleen Hard Mode Fire flexes. Keep moving through spore and whirlwind patterns.
- WixenPaldeck #078
Lord Fox
Fire mountLord Fox converts your attacks to Fire — best flex for Build C.
- Jormuntide IgnisPaldeck #121
Stormbringer Lava Dragon
Fire DPSJormuntide Ignis is a condensed Fire hammer for long Field Boss HP bars.
- BlazamutPaldeck #137
Magma Kaiser
FireBlazamut is a top Fire Pal if you already condensed it for Bastigor.
 SilvancePaldeck #193
Spore Stalwart
Catch goalOptional capture — Spore Stalwart helps the whole World Tree zone afterward.
Silvance party (~Lv 78)
Common mistakes
- Bringing non-Fire answers into a Grass field boss at Lv 78.
- Skipping Spore Stalwart capture when you plan to explore the World Tree afterward.
- Standing in spore and whirlwind patterns instead of strafing.
- Under-gearing because tower Normal was recent memory.
After this clear
- Bank Silvance's Plume for the Sealed Sanctum barrier.
- Optional capture for Explosive Spore hazard immunity on later routes.
- Route to Rotmist Root or the Forbidden Laboratory next.
Flame Funnel for Silvance Fire coverage.
Flame FunnelWorld Tree: Dandilord
Dandilord is Grass / Dark with Mist Stalwart. Field boss at Rotmist Root on the northeastern World Tree edge, ~Lv 78. The arena looks poisoned; the sludge is cosmetic, not a DoT. Fire still beats the Grass half; Dragon or Dark pressure helps if you prefer that kit. Mist Stalwart is also the Poison-apply seat used in many dual-status builds once you own Dandilord.
- Element: Grass + Dark. Counters: Fire first; Dragon / Dark as alternate pressure.
- Location: Rotmist Root (northeast World Tree).
- Reward: Dandilord’s Petal for the Sealed Sanctum barrier. Guaranteed Ancient Civilization Core on kill / capture / butcher.
- Party: same Fire core as Silvance, or Chillet / Helzephyr if you are running Dragon / Dark Build C flexes. Dodge beams and tracking orbs rather than tanking.
- WixenPaldeck #078
Lord Fox
Fire mountFire conversion remains the simplest typed answer.
- ChilletPaldeck #103
Wriggling Weasel
Dragon mountChillet if you want Dragon pressure into the Dark / Grass typing.
- HelzephyrPaldeck #080
Wings of Death
Dark mountHelzephyr converts player attacks to Dark for an alternate plan.
 DandilordPaldeck #194
Mist Stalwart
Catch goalOptional capture — Mist Stalwart unlocks Poison dual-status parties and gas immunity support.
Dandilord party (~Lv 78)
Dandilord as the Poison apply seat in dual-status teams.
Dual status buildsCommon mistakes
- Panicking at the sludge arena; it is cosmetic, not a DoT.
- Skipping Fire into the Grass half of the typing.
- Leaving without Mist Stalwart if you want dual-status Poison seats later.
- Treating Dandilord as optional fluff and losing the Petal key.
After this clear
- Bank Dandilord's Petal for the Sealed Sanctum barrier.
- Keep Mist Stalwart in mind for Poison apply builds.
- Finish the Laboratory gauntlet if the Containment Core is still missing.
Flame Funnel for Dandilord Fire coverage.
Flame FunnelWorld Tree: Laboratory
The third World Tree guardian clear is not a single Pal. Inside the Forbidden Laboratory (northwest World Tree) you fight four waves of remixed tower bosses. Survive all four for the Pal’s Containment Core. Treat it like a Hard Mode tower marathon: full endgame gear, medical supplies, and typed answers ready to swap between waves.
- Wave 1: Grizzbolt + Lyleen — Ground for Grizzbolt, Fire for Lyleen. Swap mid-wave if one typed answer is eating the wrong target.
- Wave 2: Faleris + Orserk — Water for Faleris, Ground / Ice for Orserk.
- Wave 3: Selyne + Shadowbeak — Dragon or Dark burst; clear adds and focus the real threat.
- Wave 4: Shaolong + Bastigor — Ice / Dragon for Shaolong, Fire for Bastigor. Bastigor’s freeze pressure is the wipe risk if ignored.
- Reward: Pal’s Containment Core. With Plume + Petal + Core, return to the western Sealed Sanctum barrier.
- SolennePaldeck #182
Untainted Maiden
CoreKeep the Solenne player-damage core and swap only elemental mounts between waves.
- AnubisPaldeck #139
Guardian of the Desert
GroundGround conversion for Grizzbolt and Orserk waves.
- WixenPaldeck #078
Lord Fox
FireFire conversion for Lyleen and Bastigor waves.
- AzurobePaldeck #041
Waterwing Dance
WaterWater conversion for the Faleris wave.
- FelbatPaldeck #065
Life Steal
SafetyGobfin lifesteal plan if you need survivability more than speed across four waves.
Lab gauntlet approach (max level)
Common mistakes
- Running one element through all four waves without typed swaps.
- Dumping rockets on wave one and arriving empty for later bosses.
- Ignoring the wave list and learning it mid-wipe.
- Entering without the Solenne or Gobfin endgame core.
After this clear
- Bank the Pal's Containment Core for the Sealed Sanctum barrier.
- Return west with Plume, Petal, and Core before Zenara.
- Repair and restock before Astralym; it is a phase check.
Carry typed Skill Fruits for each lab wave element.
Best Skill FruitsOpen the PalDex to fill missing wave counters.
Open PalDexWorld Tree: Zenara
Astralym (World Tree Dragon in data) has no elemental typing in live extracts, which matches community reports of no clean weakness. ~Lv 80 final story fight after the three guardians and the eight tower Key Spheres. Not a capture fight — clear for the ending and Paldex entry. Our extract includes a second Astralym form portrait for the later phase. Save strongest cooldowns for late phases and the immune window instead of dumping them on pull.
- Element: none in data. Counter: raw weak-point damage and survival builds.
- Gates: three guardian keys + all eight tower Key Spheres, then the western Sealed Sanctum door.
- Hard rematch rewards: Zenara Hat on first Hard clear (Hard Mode only, not the story clear).
- Hard Mode / rematch: full Solenne + Vanwyrm Cryst + Cryolinx Terra core; flex slots are DPS supports (Robinquill for bows) rather than elemental mounts.
- Drops / rewards: endgame cosmetic and crystal rewards; treat this as a prestige clear more than a farm loop.
- SolennePaldeck #182
Untainted Maiden
CoreUntainted Maiden Attack floor for player-damage clears.
- Vanwyrm CrystPaldeck #064
Aerial Marauder
CoreAerial Marauder weak-point amp and flying mount.
- Cryolinx TerraPaldeck #132
Explosive Strength
CoreExplosive Strength weak-point spike.
- RobinquillPaldeck #076
Grounded Archer
BowGrounded Archer when you are running bow weak-point lines.
- FelbatPaldeck #065
Life Steal
SafetySwap to the Gobfin lifesteal plan if you need a first clear more than a speed clear.
Endgame party (max level)
Common mistakes
- Dumping strongest cooldowns on pull before the immune / late phase.
- Looking for a clean elemental weakness Astralym does not have.
- Entering without Plume, Petal, Containment Core, and tower Key Spheres done.
- Treating it like a capture fight; clear for the ending and Paldex entry.
After this clear
- Enjoy the ending; Astralym is the story finale clear.
- Optional rematch farming uses the full Solenne weak-point core.
- Use leftover Training Crystals and Hard Mode towers as the ongoing endgame loop.
Skill Fruits are flex DPS here; type match matters less than weak-point uptime.
Best Skill FruitsBrowse endgame combat Pals in the PalDex.
Open PalDexCommon questions
Short answers for searches that should land here, with links to the item, map pin, or related guide when you need more detail.
- What order should I clear Palworld's tower bosses in?
- Follow the story ladder: Rayne (Grizzbolt), Free Pal Alliance (Lyleen), Eternal Pyre (Orserk), PIDF (Faleris), PAL Genetic (Shadowbeak), Moonflower (Selyne), Feybreak (Bastigor), then Azure Covenant (Shaolong). After that: Panthalus, the three World Tree guardians, then Zenara & Astralym. Tower map
- What are the three World Tree bosses in Palworld?
- Silvance at Shinespore Root, Dandilord at Rotmist Root, and the Forbidden Laboratory four-wave gauntlet. Clear all three for the Sealed Sanctum keys, then fight Zenara & Astralym. Unlock World Tree
- When does Hard Mode tower unlock in Palworld 1.0?
- After you defeat the Azure Covenant Tower (Auri & Shaolong) in the main story. Then every tower gains a Hard rematch tuned for max-level gear and optimized builds.
- Do I need to clear every tower on Hard mode?
- No. Hard Mode is optional prestige and loot. Clear Normal to progress the story, then return with Gobfin lifesteal, Knocklem rotation, or the Solenne player-damage core.
- What is the best Hard Mode tower build in Palworld?
- Safest: Felbat or Lovander with four Gobfins on Vanguard and Stronghold Strategist. Fastest: Solenne + Vanwyrm Cryst + Cryolinx Terra, then an elemental mount that matches the boss weakness. Keep all party species unique for Untainted Maiden. Solenne Pal page
- What should I bring to a tower fight I keep losing?
- The correct elemental counter for that boss, Condenser stars on the raid six, food and medical supplies, resistance rings on Hard Mode, and a sphere tier that matches the level if the fight also asks for a capture. Sphere tiers
More in Combat Formulas & Elements