
Palworld Tower Boss Guides: Loadouts, Counters, and Loot by Tower
Quick answer
Zoe and Grizzbolt at the Rayne Syndicate tower. Grizzbolt is slow, telegraphs the minigun fan clearly, and any Ground Pal from the starting island handles the element. Most players clear it around level 10 to 15.
The tower hub tells you who you are fighting. This Signal is the fight plan for the tower you keep wiping on, one loadout per door.
Tower bosses are the only fights in Palworld where a correct element pick shortens the clock more than a stronger Pal does. Every door below has one job for your party and one attack pattern that decides the fight. If you already know the roster, skip to your tower and copy the loadout.
Story order, Hard Mode rules, and the full boss roster live in the hub.
Tower raid bosses hubThe loadout rule that applies to every tower
- Bring one counter-element Pal you have actually condensed, not five off-type legendaries.
- Bring a mount that matches the arena. Flying towers punish ground-only parties on the second phase.
- Bring an Attack food buff before you walk in. Mammorest Curry at 25 percent Attack is the single cheapest damage upgrade in the game.
- Bring double the healing items you think you need. Tower arenas have no chests and no second chances.
- Scout the wildlife outside the door first. If the entrance mobs hurt, the boss will delete you.
Which meals are worth cooking before a tower run.
Food buffs guideBuild a party that covers more than one element.
Team synergiesRayne Syndicate: Zoe and Grizzbolt
Electric, around level 10 to 15, weak to Ground
Your first tower and the one most players overprepare for. Grizzbolt is slow, telegraphs hard, and cannot chase you if you keep circling. The minigun spray is the only attack that actually kills early players, and it fires in a wide fan while Grizzbolt stands still. Sidestep during the wind up, then punish the recovery window.
- Loadout: any Ground Pal you can catch on the starting island, a bow or early rifle, and Grilled Meat for stamina.
- Bait this: the minigun fan. Break line of sight behind a pillar and it wastes the whole burst.
- Loot priority: this is the tower where the Zoe hat drops on your first Hard clear later. On Normal, the clear itself is the reward since it opens the story ladder.
- Capture or kill: kill. Nothing here is capturable.
Free Pal Alliance: Lily and Lyleen
Grass, around level 20 to 30, weak to Fire
Lyleen heals herself and summons vines that root you in place. Fire pressure is not optional here, it is the whole fight. If your damage is low enough that Lyleen out-heals you, back out and level rather than grinding a stalemate.
- Loadout: a Fire mount so your own attacks convert to Fire, plus a Fire Skill Fruit on your counter Pal for a second source of pressure.
- Bait this: the vine root. Keep moving laterally and never stand in the flower field she leaves behind.
- Loot priority: Lily hat on Hard. Normal clears matter for the story gate and the level band jump.
- Capture or kill: kill.
Brothers of the Eternal Pyre: Axel and Orserk
Electric and Dragon, around level 35 to 40, weak to Ground and Ice
The first tower that genuinely checks your gear. Orserk has two damage types, which means a single counter element only covers half the fight. Ice handles the Dragon side and Ground handles the Electric side, so bring both if you have them.
- Loadout: Ice primary, Ground secondary, and an Electric Resistance Ring if you have crafted one.
- Bait this: the chained lightning volley. It tracks, so break the chain by putting a Pal between you and Orserk before you reposition.
- Loot priority: Axel hat on Hard. This is also the level band where Training Crystals start mattering for your main six.
- Capture or kill: kill.
PIDF: Marcus and Faleris
Fire, around level 40 to 45, weak to Water
Faleris is aggressive, fast, and airborne for large chunks of the fight. Water answers the element, but mobility answers the fight. A flying mount lets you keep uptime instead of watching Faleris circle out of range while your buff food expires.
- Loadout: Water mount to convert your shots, a Water counter Pal, and Heat Resistant armor if the arena chip damage is bothering you.
- Bait this: the dive. Faleris commits to a straight line, so strafe once and you get a free damage window on the landing.
- Loot priority: Marcus hat on Hard. Normal is your progression check before the Dark towers.
- Capture or kill: kill.
PAL Genetic Research Unit: Victor and Shadowbeak
Dark, around level 45 to 55, Dragon answers preferred
Shadowbeak is where players stop winning with gear and start winning with rotations. There is no clean elemental hard counter, so Dragon damage plus a lifesteal core is the practical answer. Keep a Pal alive as a distraction at all times, because Shadowbeak focuses whatever is closest.
- Loadout: Dragon damage, a lifesteal Pal such as Felbat so your own hits heal you, and legendary firearm ammo stocked deep.
- Bait this: the shadow burst around Shadowbeak. Fight at mid range, never melee range.
- Loot priority: Victor hat on Hard, plus the schematic rolls that make late armor affordable.
- Capture or kill: kill.
Moonflower: Saya and Selyne
Dark and Neutral, around level 55, Dragon or Dark pressure
Selyne is a damage race with a status layer. The dual typing means resistance rings help less than raw damage plus sustain. This is the fight where a properly condensed main Pal beats a fresh legendary you never invested in.
- Loadout: Dragon primary, status cleanse consumables, and a defensive food buff such as Galeclaw Nikujaga at 25 percent Defense.
- Bait this: the wide area sweep. It has a long tell and a short recovery, so hold your burst until after it resolves.
- Loot priority: Saya hat on Hard. This tower is also a good Pal Soul sink test before endgame raids.
- Capture or kill: kill.
Feybreak: Bjorn and Bastigor
Ice, around level 60, weak to Fire
Bastigor hits like a truck and slows you constantly. Fire clears the element cleanly, but the real fix is Cold Resistant gear so the arena stops draining you between exchanges. Bring a Fire mount and stay mounted through the slow windows.
- Loadout: Fire mount, Fire counter Pal, Cold Resistant armor, and an Ice Resistance Ring at plus two if you have it.
- Bait this: the charge. Bastigor commits forward, so dodge perpendicular and hit the flank.
- Loot priority: Bjorn hat on Hard. Feybreak is also where bounty target farming becomes worth structuring, so clear the tower and then set up a circuit.
- Capture or kill: kill.
Turn the Feybreak clear into a repeatable token farm.
Bounty token farmAzure Covenant: Auri and Shaolong
Dragon and Water, around level 65 to 70, Ice and Dragon answers
The last tower on the ladder and the gate that opens Hard Mode rematches. Shaolong punishes greed. Every death here comes from staying in a damage window one hit too long. Ice covers the Dragon side, and a Dragon mount covers your own damage conversion when the fight shifts phases.
- Loadout: Ice counter Pal, Dragon mount, best available shield, and High Grade Medical Supplies stacked to the inventory cap.
- Bait this: the phase transition burst. Disengage entirely when the arena visuals change, then re-enter.
- Loot priority: Auri hat on Hard. Clearing this door unlocks every Hard rematch, which is where the real schematic and Training Crystal income lives.
- Capture or kill: kill, then move directly to the Panthalus capture for the World Tree gate.
The mandatory capture that opens the World Tree barrier.
Panthalus guideEvery tower entrance pinned on the interactive map.
Tower map

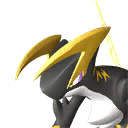
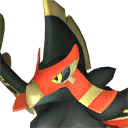
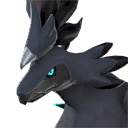
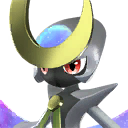
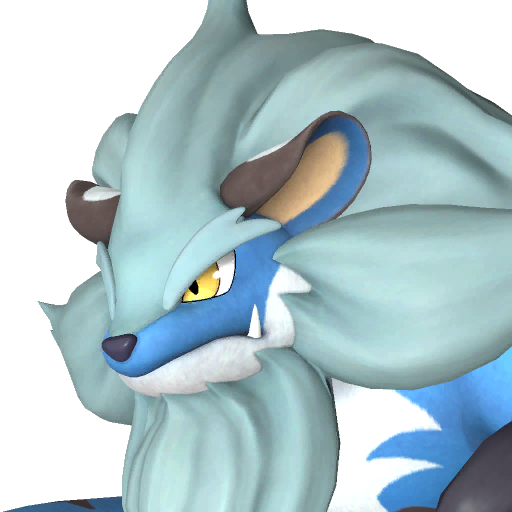
Counter mounts worth breeding for the whole ladder
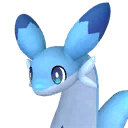
A mount that converts your weapon damage to its element is the most flexible tower investment in the game, because it turns one gun into five counter loadouts. Breed these once and you never rebuild a party for a tower again.


Plan the breeding path for a counter mount you are missing.
Breeding calculatorWhen to walk away instead of retrying
If a boss out-heals or out-sustains your damage, more attempts will not fix it. Two levels on your counter Pal, one condenser star, or a single Attack food buff usually does. Check the numbers before you spend another twenty minutes on the same wipe.
Condenser stars are the cheapest damage upgrade you own.
Condenser starsFull Hard Mode and Ultra Raid checklist.
Hard Mode prepCommon questions
Short answers for searches that should land here, with links to the item, map pin, or related guide when you need more detail.
- What is the easiest tower boss in Palworld?
- Zoe and Grizzbolt at the Rayne Syndicate tower. Grizzbolt is slow, telegraphs the minigun fan clearly, and any Ground Pal from the starting island handles the element. Most players clear it around level 10 to 15. Tower hub
- Which tower boss is hardest in Palworld?
- Auri and Shaolong at Azure Covenant on Normal, because it sits at the top of the ladder around level 65 to 70 and has no single clean element counter. Bring Ice for the Dragon side, a Dragon mount for your own damage, and disengage during the phase transition.
- Do I need a different party for every tower in Palworld?
- No. Breed one mount per element that converts your weapon damage, then swap only that mount plus one counter Pal per tower. The rest of your party can stay fixed all the way up the ladder. Breeding calculator
- Can you capture tower bosses in Palworld?
- No. Every tower boss Pal must be killed, and the human partners cannot be captured either. The only mandatory story capture is Panthalus after Azure Covenant, which opens the World Tree barrier. Panthalus guide
- What loot do tower bosses drop in Palworld?
- Normal clears mainly move the story forward. The real loot sits on Hard Mode rematches, which unlock after Azure Covenant and grant the NPC hats on first clear plus Training Crystals and a chance at legendary schematics. Hard Mode prep
More in Combat Formulas & Elements